In our climate, almost every winter is very severe and during this period quite strong and prolonged frosts can be recorded, which can significantly exceed existing systems heating houses and apartments. At critically low temperatures, the heating system simply cannot cope or entails significant costs of energy carriers, such as gas and electricity.
A great option to help with heating are various compact room heaters, one of which is an infrared heater. But the price for really high-quality devices is quite high, so you decided to tell you how to make an infrared heater with your own hands.
The principle of operation and design of the IR heater
The whole principle of operation of a film IR device lies in electromagnetic radiation, which is emitted by special devices in its design. Under the conditions, namely the necessary heating of such an environment, the device begins to radiate a rather large amount of heat. Under the influence of this electromagnetic radiation and a certain temperature, the emitter heats up and begins to give its temperature to the environment.
In order for the whole process to be successful and give the required temperature indicator, it is necessary that some conditions are fully met:
- The incoming mains voltage must be stable and are at around two hundred and twenty volts.
- The presence of a properly designed emitter in the form of an incandescent lamp or a film IR coating.
- The presence of a reflector in the design. It performs the function of a guiding mechanism, and reflects all the heat in the direction you need, thereby making the entire heater a directional device.
- Temperature controller with built-in or external sensors. It allows you to adjust temperature regime and set the room temperature more accurately.
Film IR heaters have a very simple design. First of all, they are based on two glued films, the first layer serves as a thermal reflector, and the second is used as a protective layer. They protect the structure from damage, and insulate users from the shock of the passing current. Between the films there are special metal threads that heat up and give off heat in the IR spectrum.
Thus, by assembling a structure that will meet the above requirements, you will be able to provide the necessary level of thermal comfort for your house or apartment. Thanks to the directional principle of action, you can make a separate zone that will be heated. This helps to increase savings and heat only those areas that you need for comfortable work or leisure.
We make with our own hands
One of the highest quality homemade IR heaters is a graphite-based heater. Let's first analyze what we need to assemble such a device:
- As you already understood, a certain amount of graphite is needed, preferably in the form of a powder. The quantity depends on the size of the heater you want to make yourself.
- Plastic plates. Their size is also individual and depends on the required dimensions of the device. They need to have two pieces, the same size.
- Adhesive mixture, it is best to buy "epoxy".
- Wire with plug. You can buy both new and find the old one in your garage. Select the length based on the distance from the installation site to the nearest power source.
- Voltage regulator or special controller.
- Means for insulation and fasteners.
 Graphite is crushed and mixed with epoxy glue - this is how a graphite conductor is obtained
 To apply glue, you will also need to have a brush available. If graphite is in the rods, prepare a tool to grind it into powder. Now, having collected everything you need, you can start assembling our device:
- We start by mixing graphite powder glue. It is worth noting that the greater the amount of graphite in the mixture, the higher the heating temperature will be. Do not add too much of it, as the plastic washes to melt.
- We apply the resulting substrate to the surface of plastic plates, each separately. The application should take place in uniform strokes of a zigzag shape, while it is absolutely impossible to make passes.
- We connect the bare ends of the wire to the graphite compound and glue two plastic plates and wait for it to dry completely.
- After the glue is fully strengthened and securely connected our structure, a temperature regulator, controller or device for adjusting the incoming voltage can be connected to the circuit.
- After that, we carefully isolate all joints and connections. After that, the heater will be completely ready for use.
 Scheme of the future heater
 Now you can hang the assembled device on the wall or place it on the floor and get the necessary warmth and comfort in the room. The average heating temperature of such a device is sixty to seventy degrees Celsius. If more or less graphite is added during assembly, you can increase or decrease the operating temperature accordingly.
Since the surface of the device can get quite hot, it is best to install it out of the reach of children so that they cannot harm themselves.
For greater efficiency, a thermal reflector should be placed between the heater and the wall. You can use both special and regular foil, but the second option will be slightly worse.
Until relatively recently, the infrared heater belonged to the category of "miracles of technology." Today it is a familiar device that is used in residential, public buildings, as well as in open areas. It even comes to the point that home-grown craftsmen, finally shivering in the garage, are trying to design an infrared heater with their own hands. As they say, "from what was." Is it really possible? Let's figure it out in this article.
Operating principle
Unlike a conventional heater, an infrared heater does not heat the air in the room. It heats objects that get in the way of infrared rays. And those, in turn, share their heat with the air.
The main components of an infrared heater are:
- Heating element emitter.
- Reflector (reflective part).
What to assemble an IR heater from?
- To make a reflector yourself, use polished steel or aluminum. The reflector is designed to direct the radiation flux to the desired area.
- The heating elements in the infrared heater are lamps: quartz, carbon or halogen.
Differences of lamps for a heater, or which ones to choose
In order to understand for ourselves which lamps are better to take in order to make an infrared heater with our own hands, we will analyze some of their features:
- The cost of devices with halogen lamps is lower than carbon and quartz ones.
- There is a myth that a quartz heater has a beneficial effect on people's health. This statement has nothing to do with the truth.
- With all the cheapness, the halogen device has a significant drawback: when it is working, the lamp glows. Naturally, neither for the children's room, nor for the bedroom, it is not suitable.
Important! In addition to a reflector with an emitter, the infrared heater is equipped with a thermostat and a fire hazard sensor. The thermostat is designed to maintain the set temperature, and the sensor automatically turns off the overheated device.
Now, armed with basic knowledge about the operation of an infrared heater, let's move on to making it yourself.
DIY IR heater - instructions
For work you will need:
- Reflector (made in the USSR in 19..- some year).
- Nichrome thread.
- Refractory dielectric material.
- Steel rod.
Important! A plate made of glazed ceramics can serve as a dielectric.
Procedure:
- Clean the old reflector from dust and dirt.
- Check whether the power cord, plug, terminal connections for connecting the coil are intact.
- Measure the length of the spiral that fits over the cone of the device.
- Cut a rod of the same length, wind a nichrome thread on it. In this case, the winding pitch is 2 mm.
- As a result of the last simple manipulation, you have a spiral. Take it off the rod.
- Loosely lay the spiral - so that its turns do not touch - on the dielectric.
- Connect the current from the network to the ends of the spiral.
- Turn off the heated coil and place it in the groove from the ceramic cone of the reflector.
- Connect the coil to the power terminals.
DIY infrared lamp made of glass and foil
Another option is how to make such a device yourself. And he, too, is not something overwhelming or difficult for an ordinary home master.
You will need:

The do-it-yourself infrared lamp assembly algorithm is as follows:
- Clean the surface of the glasses from dirt.
- Light a candle and, moving the glass plates over the flame, evenly smoke them.
Important! A layer of soot in the heater will play the role of a conductor. On the cooled glass, a layer of soot lies more evenly.
- Using cotton swabs, make a “frame” around the perimeter of the glass about 0.5 cm wide.
- Cut out 2 rectangles of aluminum foil as wide as the conductive layer (the same soot). Foil rectangles in the future device will serve as electrodes.
- Place the glass plate soot up and apply epoxy to the surface.
- Lay the foil over the edges of the plate so that the ends of the foil extend beyond the glass.
- Cover the resulting “sandwich” with a second piece of glass, the smoked plane inside.
- Glue the layers together by pressing them firmly together.
- Seal the structure around the perimeter.
- Measure the resistance of the conductive layer.
Important! The power of the device is calculated by the formula N = R x I x I, where:
- N is the power of the device, W.
- R is the resistance value of the conductive layer, Ohm.
- I - current strength, A.
If the obtained power value does not exceed the standard value, you can connect the structure to the outlet. Otherwise, you will have to disassemble everything and start all over again.
Laminated Infrared Instrument
To make an IR heater with your own hands, you will need:
- 2 blanks of laminated paper plastic (1 square meter).
- Epoxy adhesive.
- Graphite. It can be removed from batteries that have exhausted their life.
- Copper bar for terminals.
- Network cord.
- Wood for the frame.
The procedure is as follows:
- Mix graphite with epoxy into a thick mass. This is the future conductive layer with high resistance.
- Lay the plastic blank on a flat surface (rough side at the top).
- Apply a mixture of epoxy glue with graphite to the plastic, using zigzag strokes.
- Prepare the second blank in the same way.
- Putting the plates together with the processed sides, glue the structure.
- Make a wooden frame around the perimeter of the product.
- Wait for the glue to dry.
- As in the previous version, measure the resistance of the conductive layer and calculate the power.
Important! If during the calculation it turns out that the conductive layer has too low resistance - make a new graphite-epoxy mixture with a lot of graphite. If, on the contrary, the resistance is increased, the amount of graphite in the mixture must be reduced.
- After obtaining the optimal result, you can connect the cord to the terminals and turn on the device in the network.
- If desired, you can equip the device with a small thermostat.
Simply and easily…
And, as they say, “for dessert”, the simplest do-it-yourself heater made from an incandescent light bulb. Take a powerful incandescent lamp, place it in a case made of metal.
Important! The lamp, releasing heat, heats the metal, and that, in turn, gives up its heat to the air and, thus, heats the room. Of course, such a primitive device is only suitable for a small room as an additional source of heat.
footage
These are just four simple ways to create an infrared heater with your own hands. In fact, there are many more of them. The question involuntarily arises: do you need it? Fuss a lot, and not the fact that everything will turn out the way it should. But:
- First, knowledge is not superfluous.
- Secondly, you kill two birds with one stone. Get a useful device and get rid of a bunch of unnecessary trash.
Maybe worth a try?
Among the abundance of modern heaters, infrared models stand out as a separate group. Their principle of operation is based on the use of long-wave radiation. The peculiarity of heat sources of this category is that they do not heat the air, but the surface to which they are directed. Along with many advantages, the installations have the only drawback - the relatively high cost. Therefore, consumers sometimes set themselves the task of making an infrared heater with their own hands.
Device and principle of operation
It is important to note that any physical substance can radiate thermal energy. Electromagnetic vibrations a certain frequency, when the temperature rises, the emitter is heated. That, in turn, transfers the received heat in a directed manner. The key condition for the operation of such a device is the ability to connect to a single-phase (220V) supply network.
Structurally, the device consists of several elements:
- emitter. It may be an ordinary incandescent lamp, but its efficiency is very low. Much more promising is a multilayer panel made of a special alloy. A metal filament is laid inside. Having a large resistance, it generates thermal energy;
- reflector. One of the most important components. Its task is to direct thermal radiation to a specific sector. It can be a spherical surface (acts in a direction) or a flat panel (radiates heat to large areas);
- thermal resistance. Designed to maintain the required temperature. As a rule, this role is played by filaments or more modern analogues;
- controller. Multi-stage climate control device, which is responsible for the operation of the device in a given temperature range.
It looks like a classic scheme for the design of an infrared emitter. In practice, there are a variety of versions of this kind of heaters.
IR device options
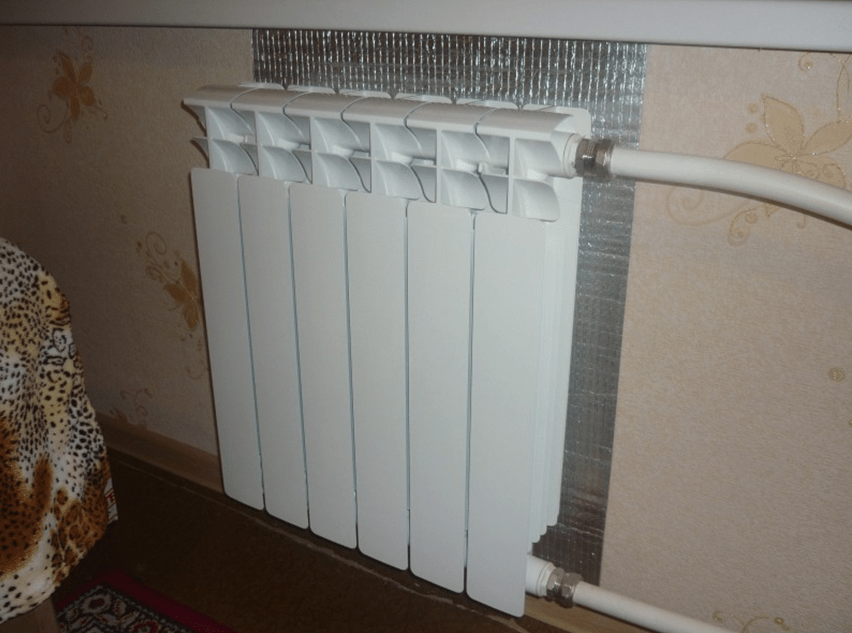
The easiest way to organize infrared heating is with foil behind the heating radiator. It can be installed in any room where there is a water heating system. This simple method will save energy. The essence of the idea is that the heat of the radiator will be reflected into the room, and not absorbed by the wall.
The fact is that any wall-mounted radiators or batteries heat the room not only with the help of convection. Additionally, they generate infrared rays. Such a simple device will increase the heat transfer of household appliances by 10-20%. At the same time, the costs of improving the heating system are negligible compared to the effect obtained.
Infrared and spiral

All costs are limited to the purchase of components - an infrared port and a filament. The tungsten filament is placed in a voluminous metal box. Ceramic inserts are installed inside it to isolate the spiral. The infrared port is connected to the heater. It will transmit into space using the infrared spectrum of waves.
Epoxy and plastic
To implement the idea, you will have to stock up on two sheets of plastic (1 * 2m), graphite powder, epoxy glue and a cable for connecting to the power supply network. First of all, you should prepare a mixture of epoxy glue and graphite in a 1: 1 ratio. The compound is applied to the rougher side of the plastic sheet in a zigzag motion. This is nothing more than a conductor with a sufficiently large resistance. 
After that, two sheets of plastic are glued together using epoxy glue. The whole structure is placed in a frame that will give it rigidity. Copper terminals must be attached to the graphite track from different sides. After the adhesive has completely dried, the device is ready for use. The temperature of the heater depends on the ratio of glue and graphite in the mixture. Equal proportions of these materials suggest heating the sheet to 65 degrees Celsius.
shoe polish box
The most compact version that can be used for narrow zone heating. To make it you will need:
- a flat plastic container (not necessarily from shoe cream);
- river sand;
- graphite;
- plug wire.
The container must be clean. Graphite is mixed with river sand in equal proportions. Next, the mixture is poured into a plastic container so as to fill it up to half. It is necessary to cut a circle from the tin, the dimensions of which coincide with the diameter of the plastic box. One of the wires is attached to its edge, after which the tin must be placed in a container on a mixture of sand and graphite. 
Now the box must be filled with a sand-graphite composition to the brim. The lid is also made of metal. Moreover, it must fit snugly into the box. When closing it, you need to create excess pressure inside the mini-tank. Another wire of the cable is connected to it. After all the manipulations, the device can be connected to the car battery or to a household network through a step-down transformer.
There are other options for IR heaters that you can make yourself. After all, the inquisitive mind of craftsmen is constantly looking for new solutions that help to adapt old and unnecessary things, improve living conditions and save on the use of energy resources.
Severe Russian winters, the inclusion of central heating on an inconvenient schedule, the absence of any heat sources in the room - all this leads to the search for alternative heating options. One of them is an infrared heater, which can be made with your own hands from improvised materials.
How it works and what it is used for
The principle of operation of an infrared heater
An infrared heater is a radiation source with a reflector - a reflector. It is these two main elements that allow it to carry out uniform heating of the room. The scope of use of such a heat source is quite wide:
- Living spaces;
- premises for economic and utility purposes;
- industrial facilities;
- open areas, etc.
The action is based on the principle of infrared radiation, characteristic of our luminary. It is not the air that is heated, but the objects surrounding the heater. And already they, in turn, share the received heat, creating a comfortable temperature within the range of the infrared heater.
Types of infrared heaters
Classification of infrared heaters is carried out for several reasons. So, according to the method and place of attachment of such equipment, the following groups are distinguished:
Mobile infrared heater takes its compactness
- mobile - compact dimensions, minimum power;
- stationary - more overall, with different power levels:
- ceiling - an extensive range of radiation, do not take up space in the room;
- outdoor - efficiency is reduced due to the presence of additional barriers to the path of IR waves;
- wall-mounted - allow installation directly under the window.
Ceiling heater saves a lot of space
The heating elements inside the device differ in wavelength, which not only allows them to be divided into separate groups, but also determines the scope of use:
- longwave - for premises of any purpose with a ceiling height of not more than 3 m;
- medium wave - for country houses and office buildings, the premises in which have a height of 3 to 6 m;
- shortwave - for factory floors and the street, because ceiling height must be over 6 m.
Type heating element distinguish:
- halogen products;
- carbon varieties;
- ceramic heaters;
- tubular.
Elements
An infrared heater of the simplest design consists of the following elements:
- metal case - the surface can be painted;
- reflective element - most often made of aluminum;
- heating element - any type;
- thermostat - may not be, but its presence allows you to adjust the frequency of heating (maintaining the optimum temperature in the room).
Calculations
When starting to independently manufacture an infrared heater, you should decide in advance on the required number of these devices and the optimal power. The calculation is made based on the norm: by 10 square meters one heater with a power of 1 kW is enough for the area of the room. So, for a garage of 20 squares, you will need to install 2 infrared emitters, while for a kitchen of 8 square meters, one device with a power of approximately 800 watts will be enough.
The IR heater connection scheme is standard for any electrical appliance - through a separate line from the machine on the electrical panel. At the same time, a thermostat is installed between the device and the switchboard, on which and from which a cable is laid for phase and neutral. Grounding is pulled directly from the shield to the emitter, bypassing the thermostat. If the total current consumption is less than 10 A, then the device can be powered from the socket line.
Necessary materials and tools
Scroll necessary materials and tools depends on the chosen for self-manufacturing models. So, for the simplest heater, in which the radiator of the heating system will perform the function of the heating element, you should stock up on reflective material - foil, as well as material for its fastening: thick cardboard, glue, etc. It is enough to place the reflective element behind the battery without pressing it against the ribs radiator, and the heat reflected from the walls will heat the surrounding objects.
For a spiral homemade heater you will need:
- tungsten filament;
- steel bar;
- metal with good reflective properties (aluminum, copper, galvanized, etc.);
- asbestos tube or piece of slate;
- brackets;
- thick wire for the stand;
- plug wire.
DIY instructions
The process of making an infrared heater with your own hands consists of the following steps:
- From a tungsten filament, make a spiral, for which it is wound on a steel bar of a suitable diameter. Then the rod is removed, and the finished spiral is set aside. The required length can only be calculated empirically, during testing of a fully finished sample (see clause 5).
- We bend a metal sheet with a reflective surface in the form of a trough, hiding the shiny side inside.
- We wind the spiral on a heat-resistant material, which is used as pieces of slate, pieces of asbestos slab, etc. We fix it with the help of brackets inside the reflective "trough".
- From a thick wire, the frame of the stand is bent and placed in the right place (depending on how the device will be located - vertically or horizontally).
- We attach a wire with a plug to the ends of the spiral and test the product. A spiral with a length like in the heating element of an electric stove will heat very strongly. If its length is doubled, then the heating temperature will decrease proportionally. By lengthening or shortening, they find out in practice the length of the element for optimal heating of the room.
To make a gas infrared heater, you will need to additionally “conjure” with a reflective element:
- from a galvanized plate we cut out two round blanks with a diameter of an ordinary tea strainer with ears for fastening;
- in one of them we drill holes with a diameter of 3 mm in a circle, in the other we cut a hole according to the diameter of the gas burner;
- we make a cylinder from a metal mesh, the diameter of which is equal to the diameter of the blanks, and fasten them to it with rivets, placing a spiral inside this structure;
- the device is fixed on the burner of the gas cylinder.
If you need a heater that will operate from a current source with a voltage of 12 volts, then use the following algorithm:
- A washed, degreased and dried glass rectangle is smoked over a candle, achieving an even layer of soot. Periodically, the manipulation is stopped to allow the glass to cool.
- Two strips are cut from aluminum foil, the length of which is equal to the width of the glass. They are placed along the edges of the smoked glass, pressed with a second clean glass and the resistance is measured with a multimeter.
- If the resistance is 120 ohms, then go to the next step. Otherwise, add soot to reduce the indicator or remove excess to increase resistance.
- With help cotton swab they are cleaned 5 mm on each side of soot and smeared with glue or sealant, pieces of foil are laid, covered with a second glass and left until the surfaces are completely glued.
- Wires are attached to the foil terminals and connected to a current source.
Video: do-it-yourself infrared heater
Features of operation and care of a homemade device
A device made from improvised means must be assembled in strict accordance with the rules for the safe operation of electrical and gas appliances. In the process of use, it should not be left turned on without control. As a rule, the mode of their continuous operation does not exceed 4 hours.
Regular maintenance of the heater consists in wiping the dust. This procedure is carried out after the heating element has completely cooled down and disconnected from the power source. Wipe with a dry cloth.
A self-made infrared heater saves energy significantly without losing the quality of heating. This allows you to use it even where the traditional heating system does not cope with its functionality or is completely absent.
Due to the constant increase in the cost of heating a home, people are forced to look for an alternative to expensive heating devices. An excellent option are infrared heaters, which have gained immense popularity due to their efficiency. After reading this article, each person will be able to figure out how to make an infrared heater with their own hands.
In order to make space heating cheaper, home craftsmen have learned to use infrared rays in home-made appliances. There are many options for the design of the heater using IR radiation. Let's consider a few of them.
A homemade heater has a significant advantage over a store-bought one - it will cost you much less. Before proceeding with its manufacture, you should understand the basic elements necessary for work. And the IR heater consists of the following parts:
- heating element (TEH), emitter;
- case is heat-resistant;
- reflective element (reflector);
- cord with a 12 V plug for connecting to a power outlet.

Almost all IR heaters consist of such basic parts. The principle of operation of an infrared heater is as follows: the incoming electrical energy is converted into thermal radiation, which transfers heat to the environment.
The main feature of such devices is that the radiation does not heat the air, but the objects (arising on the way), and then the heat passes from the objects into the air space.
In order for the homemade scheme to function, a number of requirements must be met. First, be sure to prepare radiation source, which can be the following elements:
- incandescent lamps (halogen, carbon or quartz);
- special multi-layer panel.


The panel heater is made as follows: between each layer there is a thin metal thread, which creates resistance to electric current, resulting in heating to the required temperature. Heat rays coming out of the panel heat the room.
Another important detail for assembling a heater with your own hands is reflector. To make it, you need polished steel or aluminum. The main function of the reflector is the formation of a heat flow and its direction to a given heating zone. Thanks to him, you can create certain zones of active heating.


A do-it-yourself infrared heater will cost less and give invaluable experience to a novice master. Below are instructions for making various types of appliance at home.
Making an IR heater from an old reflector
For the manufacture of such a device, the following materials will be required:
- old reflector;
- refractory dielectric (if it is absent, then an ordinary plate of any diameter made of glazed ceramics is suitable as a replacement);
- steel rod;
- nichrome thread.
Work must be performed in the following order:
- Initially, you should clean the old reflector from adhering dirt and dust.
- Inspect the power cord and plug for mechanical damage, also check the integrity of the connection terminals with the spiral.
- Measure the length of the old spiral (wound around the ceramic body) and take a steel pin of equal length.
- A nichrome thread must be wound onto the rod with a distance between turns of 2 mm.
- Upon completion of the winding, you should remove the spiral from the base and lay it (the main thing is that the turns do not touch each other) on the dielectric.
- At the ends of the spiral, connect the power supply from the outlet, and check for operability.
- A heated spiral made of nichrome filament should be placed in a recess in the ceramic cone of the future heater and connected to the power terminals.
These are the steps you need to take to make your own version of an IR heater from an old Soviet reflector.
Reflection heater
This method is one of the easiest and cheapest. To make a heater, you need several sheets of foil. It looks like this: a foil is attached behind the central heating radiator, thereby reflecting the heat coming from the battery into the room, and without it, everything is absorbed by the wall.


This modification allows you to increase heat transfer by approximately 10-20%, and the costs required for this method will be mere pennies, because you will only need to buy foil and glue.
IR heater made of plastic and graphite glue
To make such a heater you will need the following materials:
- two sheets of multilayer plastic, the dimensions of which should be 1 * 2 m;
- graphite powder;
- epoxy adhesive;
- wooden frame;
- plug into a 12 volt outlet.


First of all, you need to make adhesive solution, the basis of which will be a small amount of graphite powder and epoxy glue, in a ratio of 1: 1. After preparation, it should be applied with zigzag movements on the plastic sheet, on the side where the surface is more rough. The applied graphite treatment serves as a high-resistance conductor.
Next, you need to glue these two plastic blanks together (by those sides where the graphite solution is applied) using epoxy glue. The resulting scheme is placed in a wooden frame to make it rigid and static. From different sides of the structure, copper terminals are attached to the graphite mass. After the solution is completely dry, the wiring cord is connected to the terminals, and the device can be connected to the electrical network.
Safety
During the manufacturing work, you should be careful and careful, because you are dealing with electrical appliances. If suddenly a home-made heater fails, it will not be difficult to repair it, since it is made by hand, and you understand its device. Also you may be useful information how